Clicky Web Analytics
presentation
documentation
creation
automation
bim after dark live

Thursday, April 30, 2009

Revit Components.

0 comments
More and more people are using Revit.  Great.  The goal of this site is to introduce people to Revit and hope that they will use it.  One of the problems I am seeing with this new rise of Revit users is the use of Free Revit Components.

Ah yes, free.  Everything in life is better when it's free. Right?  Not in this case.

We are all guilty of grabbing a component or two from RevitCity.com or other free component sharing sites.  The question is; How useful was that component?  It is very likely that the component you grabbed was not parametric, not exactly what you wanted, and looked like crap in one of the views (plan, section, or elevation).

I talked with some students in a design studio class at my school and they give me a look at their Revit models.  Of course, there were a few components that popped out like a sour thumb.  Freebies!  I asked them why they used the components.  They answered, "because I don't know how to make it" or "it takes to much time to figure out".  

Firstly, you're in an architecture program.  Take the time to make the components!  It will only make you better at Revit and understand the program much better.  It will also allow you to add the amount of information you need to that component.  It will allow you to create parameters that will be necessary to quickly adjust the size, material, light output, and etc... later on in the project.

Lastly, if you are going to actually extract information from your Revit model, such as energy analysis, then those components could play a crucial role.  For example, if you have a computer classroom in Revit there are over 30 computer, a projector, and lets add two 42" flat screen T.V.'s.  Anyone who has been around these three objects, especially the flat screen T.V., knows that they emit a ton of heat!  Don't you think this should be calculated when thinking about the heat loss or amount of heat needed for a space?  

Ultimately, I want my fellow students to not let the people who say "Revit is just a program full of built in components and restricts design freedom" be correct.  Let's not go the way of BIMpanzee's and CAD Monkeys.  Let us think deeper and farther out of the box.  Revit is not a drafting program.  Let's not use it as one.  

I hope this comes into your mind next time you are on RevitCity.com searching for a Mac that you can add to a desk that was already imported from a Revit model that was built in Revit 8.1.  


Wednesday, April 29, 2009

Having trouble with 2010?

0 comments
Are there a few commands you just can't seem to find. Do you get to frustrated finding them? Here is a great web page. Simply click the command in Revit 2009 and it will show you where the command is in 2010:

Check it out here!


Thanks to Greg over at Revit3D.com for the fin.

Revit Classroom Workflow - Step 4

0 comments
Implementation/Documentation

At the completion of step three of our Revit Classroom Workflow segment you should have a clearly defined Revit model.  You have already explored many different material, structural, and mechanical options.  You've analyzed these options graphically and numerically.  Most importantly, you've extracted priceless information from your model and, in doing so, have become more intimate with your building/concept at a much deeper level than ever before.

The next step, implementation/documentation, will vary depending on the program requirements of your school.  Some programs may require a complete set of detailed construction documents, while others won't even require dimensions.  Conversely, in the professional world this step is crucial.  Revit excels during the construction document process.  Your model, by now, should be thought out and developed enough so that when you cut a section it is correct.  Not necessarily to the detail of sill plates and nuts and bolts (see this tutorial).  But a generic solid filled section should be created.  There are still days when I site back and marvel over the amount of sheets that I generate in such a short period of time during this step.

A great tip to keep in mind during this stage is utilizing some drafting views.  This will apply more for professional practice but is great to know as a student.  Drafting views have great advantaged when being used on typical details.  For example, handicap toilet details will rarely ever change.  Take the time to draft some beautiful typical details using wide lines for walls (keeping it generic so it can apply to many cases).  Simply import them (or add them to your Revit template).  Drag them on a sheet and call them out! (See this tutorial). 

I am not going to explain how to create construction documents and what is required.  That's for you to know and learn in school.  I will explain some of the advantages you will experience during the C.D. phase because you are using Revit:
  • Very quickly create sheets and paper.
  • Instantly create details and sections in an place or direction. (Who knows, your professor may ask you to cut a section on a 30 degree angle... easy!)
  • Elevations are already created.  Simply dimension, note, and detail as needed. (if you have a building with angled masses Revit is priceless.)  Also, light shadows add great depth to your elevations.
  • Instantly create and coordinate schedules.
  • Coordination of all callouts is done for you.  No more printing and redlining over and over again because you consistently forget to change that one section bubble.
  • If a spec book, or project manual, is required, E-Specs coordinates your model with your project manual.
  • If a budget is set for the project material take-offs, automatic scheduling, and Cost-X will make your life much easier.
  • If you must coordinate MEP, Structure, and Architecture, NavisWorks can be used for a variety of outcomes.  From collision detection to presentations.
These are only the main advantages I could think of when using Revit to create construction documents.  The proper usage of all of these programs and Revit will greatly help you in the classroom and in the work force.  The ability to create construction documents with such ease and speed, in my opinion, is changing the percentage of lump sum pay an architect will charge for that phase.  Leaving more time and money for design.

Stay tuned for the next step on our chart!

Tuesday, April 28, 2009

My First Revit 2010 Tutorial!

1 comments
I decided to answer a question I received in an email a while back using 2010.  Why?  Because it's out!  The question had to do with creating vertical siding (t1-11) in Revit.  See the video for more explanation:

Topics Covered:
  • Creating a Vertical Reveal
  • Creating a New Surface Pattern
  • Editing Rendering Material

Monday, April 27, 2009

Revit 2010 - First Project.

2 comments
Here is the first project I did on Revit 2010.  Finished it early last week.

The basis of the project was to produce some nice renderings and run some environmental analysis's for my classroom.  I did not get detailed as far as construction documents and plans, etc...  This was only for a speech I have to do tomorrow.  The speech is going to be a persuasive speech about why I think the class should think, build, and design green.

Did I mention that this is for a Business Communication class?  Well, it is.  How about that... using Revit for a business communication class powerpoint.  Who would have thought.

Here are the images I rendered:
I figured I would use these images as an introductory "attention grabber" explaining how the class would look if it was green.  

I also used Green Building Studio to run some energy analysis of the classroom.  Using green materials and coating the glass ends up saving the school roughly 1000 dollars a year... per classroom.

Just thought I would share with you one of the many ways you can use Revit in school.   Even if you are not in a design studio.

Sunday, April 26, 2009

BIM and IPD Success Stories.

0 comments


Great article about three success stories involving BIM and IPD. Some awesome images too!

"As design and construction budgets shrink and clients demands for quicker, more efficient design and delivery continue to escalate, many architecture and construction firms are embracing integrated project delivery, an approach that integrates people, systems, business structures, and practices into a process that collaboratively harnesses the talents and insights of all participants to reduce waste and optimize efficiency through all phases of design, fabrication, and construction... " Read More

Saturday, April 25, 2009

Autodesk NavisWorks

0 comments
The next program to introduce you all to before the next step in our Revit Classroom Workflow is called NavisWorks. First, here is a brief summary of the program and what it does:

By combining the high-quality 3D design data created by AutoCAD® software, Revit®-based applications, and Autodesk® Inventor® software with geometry and data from other design tools, Autodesk Navisworks project review products enable a dynamic real-time, whole-project view for:
  • Effective 3D coordination analysis
  • 4D planning simulation
  • Accurate photorealistic visualization
The aggregated whole-project view can be published in both Autodesk Navisworks native NWD format and 3D DWF™ format, giving all stakeholders access to the virtual project with Autodesk Navisworks Freedom.

Did I mention that Navisworks Manage is completely free for students through the Autodesk Student Community? Well, it is. I will get more in depth about how Navisworks can create advantages for you in the Studio during the next step of the Revit Classroom Workflow. To me, Navisworks is sort of the graphical representation of BIM. It visually shows the collaboration of all parties and how they all contribute to the process. As usual, here is a bunch of links for you all to learn about Autodesk NavisWorks:

Friday, April 24, 2009

E-Specs

0 comments
E-Specs is another program that you may never use in your professional career, but it will have you understanding Revit much better.  Personally, I believe it should be used in profession career.  I will get more into how it will be applied during our Revit Classroom Workflow.  For those of you do not know... Revit is a Database.  I know what you're thinking.  Microsoft Access?  Database?  Believe it or not, attached to all those pretty 3D models you are creating is a giant list of ID numbers and parameters.  

"e-SPECS for Revit interfaces with Revit's parametric database, instantly updating your project specifications to the requirements of the building model. Insert a wall, door, window, or any other building object into your Revit model and instantly update your project manual with the appropriate specifications. Any changes you make to the designs will automatically be incorporated into the specification manual. And with the click of the mouse, you can access all the other functionality that e-SPECS provides to update your sections on-the-fly, post project notes, review section markups and more."

Basically, e-Specs uses all of those complicated ID numbers and parameters to create and edit your specifications.  Linking your office or typical specs with your Revit file makes it easy to update these specs.  Additionally, when working in teams, it will allow team members to add comments and redlines into the project manual.

Thursday, April 23, 2009

Revit 2010 Enhancements.

2 comments
Great post over at The Revit Clinic pointing out some new enhancements in Revit 2010.  The ability to control halftone is great and I know will help me out.  The gradient 3D bacground is also much more pleasurable to work one than flat white in my opinion.


Also, Revit Fix posted and interesting piece about some the bugs/errors in the program previously as well as if they have been fixed in 2010.

Fake or Foto Challenge.

2 comments

This is always fun.  I remember playing this game last year or so.  There are ten photos and you have to chose which ones are real and which ones are fake.  

I did pretty bad!  It is amazing the realism of these CG artists... I guess if the pictures were larger it might be easier.

Play the Game Here.

Wednesday, April 22, 2009

Revit 2010 - Counterstrike Review

5 comments


The last few guests exit as the last piece of confetti falls to the ground. The party is over. All the hype, anticipation, and excitement is slowly fading. Revit 2010 has been released, downloaded, and installed. The smokes has finally cleared and it's time to really take a look at the program.

I am using Revit 2010 as a student and as a professional. I just completed my first student project with Revit 2010 and worked on it for the past five days. I would first like to address the new ribbon bar.

Using Microsoft Office 2007 has given me quite a negative bias towards the idea of a ribbon bar. I am surprised to find that I like the ribbon bar! Regardless of the tons of negative reviews about it (see Phil's post and Augi Forums) I have found it pleasurable to work with. The collaboration of keyboard shortcuts and the new ribbon flowed very nicely for me. Many of the negative reviews about the ribbon revolve around the amount of mouse clicks it takes. Well, with the old design bar on the left it is exactly the same. If you are in the "Basics" section and need to place a structural column a few clicks are required. Ultimately, the ribbon bar has always been there... just on the left of the screen instead of the top. The main negative comment I will make about the ribbon bar is the fact that certain tools, such as the "thin lines" and "split" are hidden within it. The solution to this was simple though. I just right clicked the icons I wanted and added them to the Quick Access Toolbar. Once I added these few tools to the Quick Access Toolbar I found the overall workflow to be very similar.

Putting aside the debate and conspiricy theories about why big bad Autodesk utilized the ribbon interface I believe it was not as horrible of an idea as many are exclaiming. The ribbon's advantages in Microsoft Word or Excel are appearent because those programs are very linear. Step one follows step two, etc... Revit is not a linear program. The user is consistently navigating back and forth between all aspects of the ribbon. Revit is more like step one, step two, step six, and back to step two, etc... I believe this is where all the frustration arises. I felt the frustration for the first day or so. After two days I began to get comfortable with the new locations of the SAME tools and my workflow has not been interrupted. Once again, I would like to reiderate that the ribbon has ultimately always been there.

An issue that seems to be constant with the reviews on the Augi Forums is Revit 2010's unstability. I have yet to have a stability issue. In fact, I find 2010 to be more stable than 2009 on my computer. Revit 2009 has been prone to lots of errors for me. Revit 2010 has not given me a single error since installing it (knock on wood). For those of you who follow my blog you know I am running the program on a Mac. That's right... Running it on a Mac and not getting any errors.

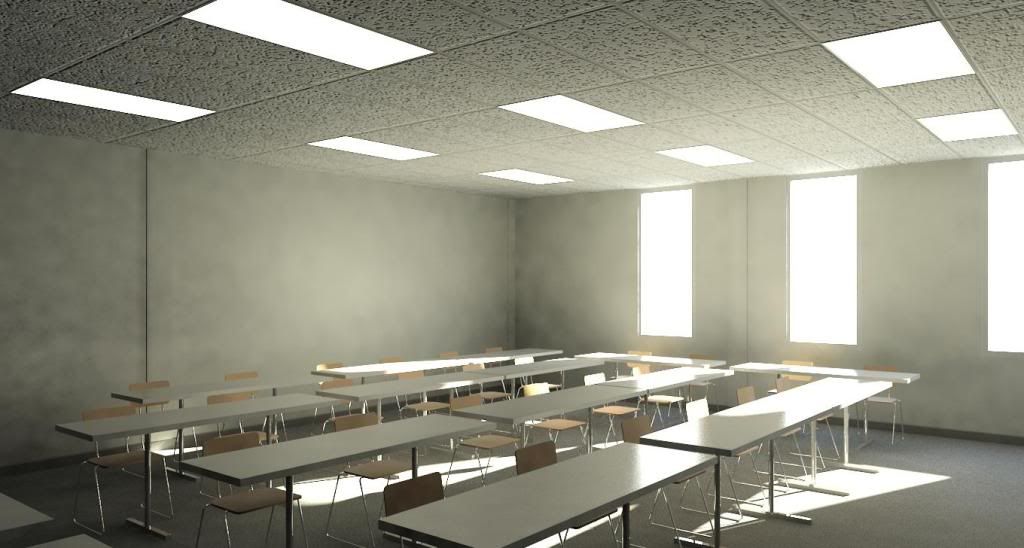
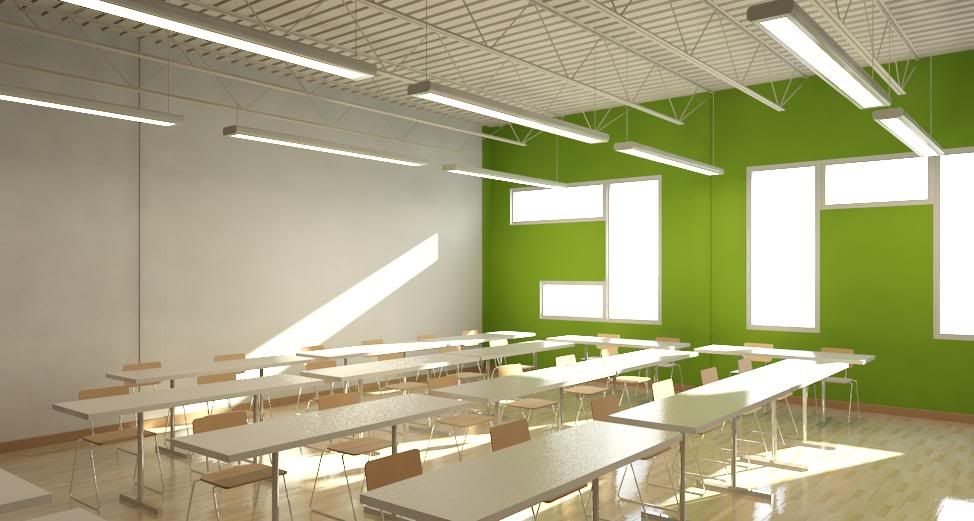
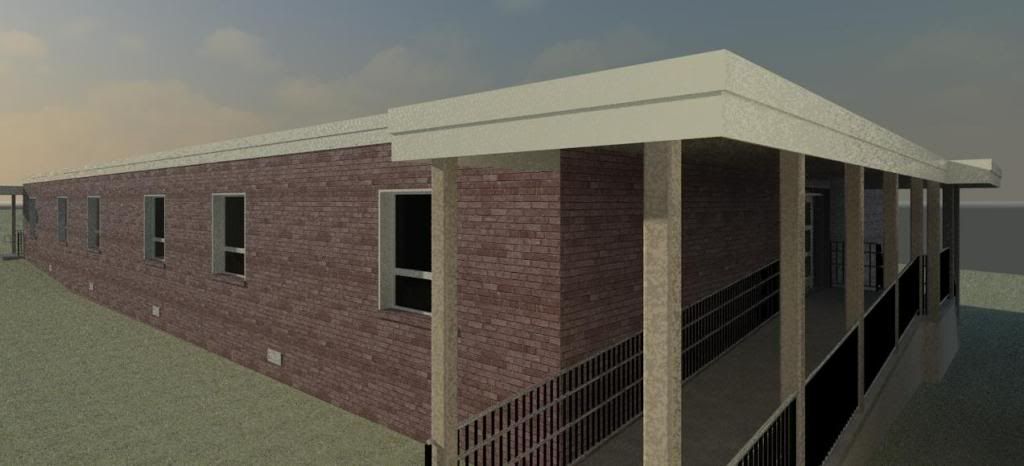
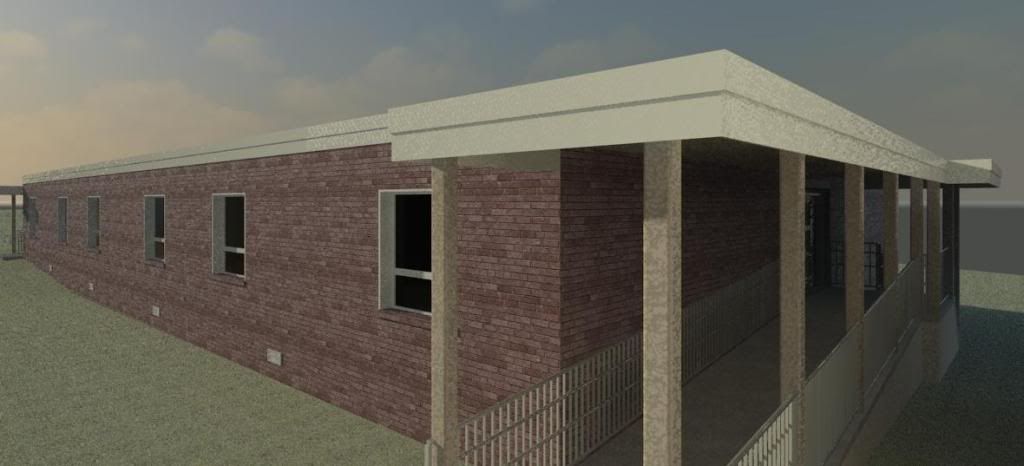
The speed of the program overall has increased greatly for me. I believe this is due to the 64bit program and operating system as well as the new DirectX graphic accelleration. I've done multiple tests opening very large projects (over 50mb projects) and the panning, orbiting, and overall speed has increased quite a bit. See my "Rendering Speed Test" post for information about the increase in rednering speeds.

The final addition I would like to review is the conceptual massing environment. Many users are complaining about their "wishlists" not being taken into consideration. In my case, a massing environment like the one added to 2010 was part of my revit wishlist. As a student, the ability to model organic forms, manipulate them, and parametricly drive them is absolutely priceless. The only downfall is that the conceptual massing environment is only an environment. The integration between the conceptual massing environment (or family) and the project is not as developed as I would like. Something as simple as allowing a conceptual massing family change it's family category would be a serious improvement. Better yet, to add the modelling capabilities to all of the family type editors would be very useful.

My perspective of Revit and Autodesk may be much different from the various reviews I have read. I am not an Autodesk shareholder. I have not had to purchase the program for my own business... yet. I use the student and commercial versions every day and utilize all the resources possible. Call me naive if you would like, but I choose not to buy into the "big bad company that conspires and does not care one bit about its costumers" theories. The sad truth is, Revit would not be what it is today without Autodesk's millions of dollars invested in it. There would be no Revit Structure and MEP. Many of us would not have even heard of the program!

In conclusion, I am satisfied with Revit 2010. I believe it is a step in the right direction (perhaps not a big enough step... but a step nontheless). The overall performance has increased dramatically, workflow has not changed much, and the ribbon is just an upgrade to an old design bar.

Now... let's hear the counters!

Comment away!


Tuesday, April 21, 2009

Architectural Excess... hmm..

0 comments
The economic crash has brought a decade of lavish “icon”-building to a halt. Does this mean an architecture of “excess” will be replaced by one of “relevance?” Frances Anderton speaks with Frank Gehry and Architecture for Humanity’s Cameron Sinclair.

Interesting podcast.  Intriguing interviews with Frank Gehry and Cameron Sinclair.  

I.E.S. Version 5.9.1 for Revit 2010!

0 comments
Version 5.9.1: Now compatible with Revit 2010

Integrated Environmental Solutions is delighted to announce that the latest edition of the software, version 5.9.1 has just been released and is now available for download along with the updated Revit plug-in.

Download version 5.9.1 TODAY!

This new version of the software is available for download through your software installation via IES Online > My User Area.

Full details regarding all software updates in this version are contained in the updated Release Notes and New Features documents.


Also... 

Autodesk Green Building Studio has a Beta plugin for 2010.  I have used it and it works very well... Check it out!

Cost-X

0 comments
Carrying along with our Revit Classroom Workflow chart I would like to introduce a new program to you all.   Before reading about the program and thinking to yourself, "what do I need this for... show me a tutorial damnit!", I would like to explain why I think it is important to know this program.  Ultimately, as an architectural student and practicing architect you may never use the program.

During the BIM process a program such as Cost-X will have great advantages.  Our job, as architects, is to provide the contractor or person using Cost-X with a usable building model.  What is a usable building model?  Well, that is precisely why you should know the program and how to use it.  In the next step of our Revit Classroom Workflow I will explain how to incorporate the program into your design studio.  This will allow you to navigate the program and understand how it work.  It will also give you cost estimates if needed for the studio project.

Some great links:


Monday, April 20, 2009

Revit 2010 vs. Revit 2009 - Rendering

8 comments
All over the blogosphere and the internet there is talk about the rendering speed on Revit 2009 versus the rendering speed on Revit 2010. I took it upon myself to run a few tests of my own. Long behold, Revit 2010 WON!

First, here are the specs of the machine I rendering on:
  • 15.4" Macbook Pro
  • Windows Vista Home Premium 64bit (Bootcamp 2.1)
  • 4gb Ram
  • Intel Dual Core 2.4
I had no other programs running. I first ran the render with Revit 2009. The settings for both rendering were identical:
  • Quality - Medium ( I didn't feel like sitting there all day)
  • Resolution - Screen (1180 x 537)
  • Lighting - Exterior (Sun only)
And the results:
  • Revit 2009 = 6:38
  • Revit 2010 = 4:57
That is a total increase on rendering time of 1.41. I ran the test a few more times and it came out to the exact same numbers. If i did my math correct that is a 25% increase in rendering time. Therefore, if this stays constant a 1 hour render in Revit 2009 will only take 45 minutes in 2010. It is getting there... If they would only introduce multi-core support for Revit rendering...
My second test (same scene and settings except for Quality being set at Best):
  • Revit 2009 = 4:5:36
  • Revit 2010 = 3:10:58

Roughly, 25% increase! Looks to be constant!


Here are the images that were rendered (these are on Medium Quality):
Perhaps I will do a few more studies adding in artificial lighting and different factors. Furthermore, we have a number to spit out when the conversation about how much "faster" the new Revit is. I believe I am the first one to do a full out bench mark test and publish it. So feel free to spread it around!

Revit Architecture 2010 for Students!

3 comments
Head on over to the Autodesk Student Community!! Revit 2010 is now available for download to all students! 64 and 32bit versions. This is much earlier than I expected! Great!

Autodesk Student Community

Sunday, April 19, 2009

Civil 3D 2010.

0 comments
Great article about Autodesk Civil 3D 2010.  Anyone out there thinking about surveying?  I had to take a Surveying class this semester and learned a little bit about the many programs out there for surveyors. 

The adoption of 3D building models (Revit and BIM) will hopefully push some of the surveyors to use Civil 3D more.  Generally, even us Architect students should have a basic knowledge about the program (plus it is free on Autodesk's Student Community).


Credit to Greg for the find.

Tutorial - Rebar Detail Component

5 comments
Here is a cool little tutorial.  I found it useful in school when my teacher wanted to see a section drawn with the rebar looking as it does in the tutorial.

Topics Covered:
  • Creating a Detail Component - Line based
  • Using Array Parameters
  • Applying a formula to the Array Parameter
  • Drafting the Rebar

Saturday, April 18, 2009

New Email Address.

0 comments
Hey guys!  While you are all so busy playing around with 2010 I would just like to inform you I have a new email address for sending all your Revit questions, comments, and concerns:

Jeff@TheRevitKid.com

Please email me there!

Revit 2010 - Install and Learn!

0 comments
Now that you can download and install all of the Revit 2010 packages check out David at DesignReform.net's videos and follow along! Begin to understand the new advantaged and capabilities of Revit 2010.

Here are a collection of the DesignReform.net Videos using 2010:

Here are some more links to tutorials and information:

Stay tuned. I will be incorporating Revit 2010 videos and tips into the site now. Check out my Revit Classroom Workflow and incorporate Revit 2010 to its fullest intent in the classroom!

Friday, April 17, 2009

Revit Classroom Workflow - Step 3

0 comments
Analyze

Analyzation of your building could require many programs and will force the you, the designer, to think about many other issues and aspects of your project besides the actual design.  What I mean by this is that the normal student will pick a material or two and be told  steel and concrete will work and then move on.  Unless the structure is given and restricted then there are many options to go from but yet every design course I have been in a majority of the class has the same wall sections and structure.

The use of the programs I introduced combined with a well built and thought out Revit model will allow  you to explore many different options for materials and for structure.  You will also be able to analyze graphically the effects changing the structure and materials will have on the building, concept, and  environment.

Structural Analysis:

Revit Structure and Robot Structural Analysis are completely free to students.  Why would you not download it and give it a try?  With basic structural knowledge learned in an introductory structures class you will be able to explore and understand many different structural options for your building.  If the professor requires a certain type of structure these programs can still be used to analyze if the structure given will fail.  If you want to feed the "wow" factor, Robot can create some awesome images for your presentation.

The important thing to keep in mind when adding structure to your model is DO NOT OVER MODEL!  It is very easy to get carried away and before you know it you are creating a parametric bolt and nut assembly!  Exploring Robot Structural Analysis and getting familiar with the program will give you an idea as to HOW much needs to be modeled.  This is why I am introducing these programs to you.  Understanding how the programs analyze will save you lots of time and teach you how much you truly need to model.

How much structure that actually needs to be modeled is very project specific.  In Revit Architecture, the components under the "Structure" tab will most commonly be used.  In some cases studs and floor joists will be required.  For a architectural design student every stud and rim board will be overkill.  A simple preliminary analysis is all that is needed (in most cases the "Structures" tab will have you covered.  Ultimately, the importance of this step is how it will force your brain to think differently about you project.  You will think outside of the model and further the information that will be extracted from it.

Energy and Environmental Analysis:

To take full advantage of your Revit model there are lots of energy analysis programs out there. The three I introduces to you were:
Green Building Studio is the only one you cannot get for free as a student.  Although, you can get a sixty day free trial (enough time for the last month of the course to make studies).

Once again, the program used will effect the thought process of how you will create the Revit model.  I.E.S. is my personal favorite.  It has a plug-in directly inside of Revit and is very user friendly.  All of the programs have great features for a design studio.  For example, in all of the programs it is as simple as adding walls, windows, doors, and creating a room.  You know that Room command in Revit that creates an annoying blue box that you always end up clicking?  One of the functions of that blue box is to calculate volumes.  Now, with I.E.S. you can take that one Room and analyze the effects of many different window, walls, and HVAC options on your building (see tutorial on I.E.S. page.. email me if you want a tutorial with more clarification).  This process will induce thoughts new thoughts about your design and you can see its effects on the environment and how it will "live" before it is even built.

The process described may seem obvious and may seem like common sense to some.  If you keep all of the information I just talked about in mind while designing and creating your Revit Model your concept becomes more dynamic.  Your building will be more coherent to you and others while simultaneously an intelligent virtual model is being created.  A model that will simulate the "life" of your building and how it will "live" without even being built.  

Remember... BIM.. Building INFORMATION modeling.  Get information out of your model!!


Thursday, April 16, 2009

Download Revit Architecture 2010 Now!!

11 comments
Thanks to Greg at Revit3D.com for linking direct downloads of all the new Revit software:

Download, download, download! Even if you can't register you can get used to the program. The only restriction is you cannot save.

GO!!!!!!!!!!!!!!!!!!

Tutorial - EIFS Aesthetic Joint

2 comments
I was asked a question about how to show panel joints in elevation and 3D views.  There are many ways to do so.  In this tutorial I show one simple way to do it... but not necessarily the correct way.  If you need to have TRUE joints there are other routes to take.  I will go over those in later videos.

Topics Covered:
  • Creating a Wall Sweep Profile
  • Adding a Wall Sweep to a Wall
  • Editing a Material
  • Creating a Custom surface pattern.
  • Manipulating a Model Line based surface pattern.


Wednesday, April 15, 2009

AutoCAD 2010

0 comments
I know this is a Revit blog but this could be good Revit student news. The new AutoCAD 2010 is availiable for downloads to students on the Autodesk Student Community site today! This comes a week or so after the official subscription release of AutoCAD 2010.

This COULD mean Revit 2010 will be availiable to students within the next two weeks... I will keep you all updated.

By the way.. here is Autodesk Ed's youtube channel. Some interesting videos there!

PushPullBar - Forum

0 comments


I found a Forum that I have grown to like. Looks like it has been around for a while now but I just found out about it and would like to share it with you all.

Their Mission Statement:

"[pushpullbar]2 is a forum dedicated to the advancement of architecture+design through the sharing of ideas, critiques, discussions and experiences."

Looks to be a great discussion board. A certain discussion grabbed my attention and I will be adding my two cents in once the moderators give me the rights to post.

Here is the post that grabbed my attention. I think all of us Reviteers should explain to them why they should not be using Sketchup and AutoCAD.

I hope to market this site on the forum and guide some of those members into The Revit Kid's world.


Tuesday, April 14, 2009

Pritzker 2009 - Peter Zumthor

0 comments
A brief step outside of Revit but not outside of Architecture. For those of you who do not know what the Pritzker Prize is here is a brief about it form their site:


To honor a living architect whos built work demonstrates a combination of those qualities of talent, vision, and commitment which has produced consistent and significant contributions to humanity and the built environment through the art of architecture.

The international prize, which is awarded each year to a living architect for significant achievement, was established by the Pritzker family of Chicago through their Hyatt Foundation in 1979. Often referred to as “architecture’s Nobel” and “the profession’s highest honor,” it is granted annually.

The award consists of $100,000 (US) and a bronze medallion. The award is conferred on the laureate at a ceremony held at an architecturally significant site throughout the world.


Congradulations to Peter Zumthor!

Links to Works of Peter Zumthor (Thanks to ArchDaily and Archinect):

Also, one of my favorite acceptance speeches was made during a Pritzker Ceremony by FrankGehry. Wethere you like or dislike his architecture it is a great speech and you should check it out.

Here is the list of Laureates. Some great Speeches by all of them.

Monday, April 13, 2009

Revit 2010 Information.

0 comments
Some videos and information about Revit 2010:

Integrated Environmental Solutions.

3 comments
The third and final environmental analysis software I would like to introduce you too is Integrated Environmental Solutions.  This program is NOT by Autodesk... I know... crazy huh?  

I.E.S. offers a completely free version of a simple energy analysis called VE-Ware.  My favorite feature of this program is its compatibility with Revit.  It installs a plugin directly inside of Revit and with a few click you can make a simple energy usage and carbon emission analysis.  For participating schools the entire tool kit is free.  For students in non-participating schools they have a student offer (linked below).

With the free VE-Ware you will be able to:
  
1. Import geometry data
2. Tell it where your building is in the world
3. Define your: building type, construction materials, heating and cooling system types and room types
4. Press a button – automatic detailed thermal simulation is performed for you
5. Get output on: energy consumption, CO2 emissions and US benchmark against the Architecture 2030 Challenge
6. You can then easily modify your building and assess different options.

As far as ease of use and coherence go this program is very simple.

Here is a list of links:

Sunday, April 12, 2009

Comment Response:

0 comments
I received a few comments about the product introductions that will lead into the next step of our Revit Classroom Workflow Chart... This was the response I posted so we are all on the same page:


The Product articles are not all autodesk as you will see and they play a crucial role in why we are using Revit. The focus of this blog is not being lost at all. If you read my welcome post (under "mission and experience" on the right hand side it clearly says:

"I would like this blog to contain tutorials done by others and myself. I would also like it to be an archive of the many questions I have received by students about Revit Architecture and the like. Finally, I would like it to encourage the use of Revit in the classroom as not only a tool but a tool that will create a smart and usable building information model."


I want to encourage students to use Revit and learn how to use it... but they must know WHY they are using it. The Introductions to the products I am showing will help you further understand the next step in the Revit Classroom Workflor Chart - Analyzation. It is much better to understand this before or while you are learning Revit because it will effect your mindset and thought process when developing a Revit Model.


There will be more videos and I have a few made already...


I do not want to create the monster that I have been trying to avoid. A bunch of BIMpanzee's that will use Revit as a drafting tool that creates "wow" factor only. I want you students to use Revit as much more than that.

Autodesk - Green Building Studio

9 comments
The second environmental analysis program in our three part introduction series towards the Revit Classroom Workflow Chart.  

The Autodesk® Green Building Studio® web-based energy analysis service can help architects and designers perform whole building analysis, optimize energy efficiency, and work toward carbon neutrality earlier in the design process. With faster, more accurate energy analysis of building design proposals, architects and designers can work with sustainability in mind earlier in the process, plan proactively, and build better.

The best explanation for this program is are the videos on Autodesk's Website: See them here.

Very cool program.  Autodesk offers a sixty day free trial for students that are part of the Autodesk Student Community.

Saturday, April 11, 2009

Autodesk - Ecotect

0 comments
There are quite a few environmental analysis programs out there for Revit and BIM.  My personal favorite is Integrated Environmental Solutions because of its integration with Revit (I will introduce I.E.S. in the upcoming posts).  

First, here is a quick intro to Ecotect:

ECOTECT is a complete building design and environmental analysis tool that covers the full range of simulation and analysis functions required to truly understand how a building design will operate and perform. It finally allows designers to work easily in 3D and apply all the tools necessary for an energy efficient and sustainable future. Check out its features to learn more.

Once again, Ecotect is completely free for students who belong to the Autodesk Student Community.  I think what I will do is introduce the three major environmental analysis programs within the next few days.

After all of the introductions I will personally compare and contrast the three programs.

Links for Ecotect:
At the end of this software introduction series I will connect the dots with the Revit Classroom Workflow Chart.

Friday, April 10, 2009

Revit 2010 Video Tutorial - More more more!

0 comments
David over at Design Reform keeps the 2010 videos coming! His traffic must be spiking like crazy these past weeks! Thanks for further inducing my excitement Dave!

Wiimote Rear Projection Architectural Redlines

0 comments
Today was supposed to be a little synopsis about the lecture I attended last night.  Sadly, if any of you attempted to go, Phillip Bernstein never showed.  Needless to say, I was very bummed.  I drove an hour just to find out there was no lecture.... Oh well.  Here's a quick find:

Interesting video I found on the Autodesk Student site.  Could be used in a classroom as well:

Thursday, April 9, 2009

Revit 2010 Student Community Release.

0 comments
Word around the student community is that Revit 2010 will be releasing to students around June of this year.

There is nothing officially released but this appears to be the common denominator between all of the answers.  If history repeats itself then it would be a correct assumption.  The Autodesk representatives will not let me know of any ore details.

Let's hope its sooner, but I will keep you all posted!

Autodesk - Robot Structural Analysis

0 comments
The first program on the Revit Classroom Workflow Chart I would like to introduce you all to is Autodesk Robot Structural Analysis.  There are a few reasons why I added this program to the chart.  The first reason is that it is completely free for all students!

From Autodesk's Website:

Autodesk® Robot™ Structural Analysis Professional software offers powerful analysis with exceptional finite element auto-meshing capabilities, providing structural engineers with a faster means for tackling the most complex simulations and model calculations. Core features of Autodesk Robot Structural Analysis Professional include:
  • Seamless bidirectional links with Autodesk Revit Structure software
  • Advanced finite element auto-meshing capabilities
  • Wide range of analysis capabilities
  • State-of-the-art analysis solvers
  • Extensive output of analysis results
  • Multiple languages and units for global markets
  • Country-specific preferences and design codes
  • Integrated design solution for reinforced concrete and steel
  • Integrated workflow from structural analysis and design to fabrication drawings
  • Open and flexible API (application programming interface)

Obviously, unless you are a structural engineer some of this stuff is WAY overkill.  I find that the basic analyzations that could be produced are very helpful.  Especially to visually see the results.  For the designer, it is a great tool to really understand how your loads will be distributed and where they might be excessive.

The point I am trying to make is that you are taking the time to create this beautiful building information model... GET SOME INFORMATION OFF OF IT!

At your request I will go deeper into any of these programs that I am introducing.

Here is some more info on Autodesk® Robot™ Structural Analysis:

Wednesday, April 8, 2009

Lecture Tomorrow.

0 comments
Don't forget the Phillip Bernstein Lecture tomorrow guys and girls!  

Here is a preview of him speaking:


On June 4th, 2008, Autodesk hosted an executive event in New York City that brought together owner representatives, design practitioners, engineers, and construction professionals for an examination into Integrated Project Delivery workflows and building information modeling. These recordings capture presentations from Phil Bernstein, Vice President for Industry Strategy and Relations, Autodesk, Inc. and Harold Goldberg, Esq., Principal, Goldberg, Pike & Besche, P.C. and outside legal counsel to the AIA.

If you are in the Hartford area... or within an hour like me... GO!

Trelligence Affinity

1 comments
I'd like to introduce you all to a program that people will love or hate. The program parallels with the Design segment of my Revit Classroom Workflow Chart.

Trelligence Affinity™, Affinity for ArchiCAD™, and Affinity for Revit™ is software focused on enhancing the early architectural design process with a unique programming, space planning and schematic design solution. Targeted at the worldwide architectural, engineering, construction and owner/developer (AECO) market, the Trelligence Affinity patent-pending software integrates with ArchiCAD from Graphisoft, Revit Architecture from Autodesk, and other design tools to extend the benefits of Building Information Modeling (BIM) - faster planning, less rework and better team collaboration - to the early design phases of complex building projects.

I say it will be loved or hated because many designers will feel as though these early schematic diagrams and space planning should be done like it has always been done. With pencil and paper. I too design with pencil and paper first. Although, I used this program for a day now and it has its advantages.  It is not meant to replace the pencil and paper atmosphere but to help in the further development of the pencil and paper drawings to the intelligent building model. Just another tool to add to the aresonal. Check it out for yourself and form your own opinion.

Trelligence Affinity Links:

Tuesday, April 7, 2009

Revit Classroom Workflow - Step 2

1 comments
Design

During the design phase of the Revit Classroom Workflow diagram the concept of your building is moulded into a semi-structured form.  I say "semi-structured" because this step is till very preliminary and will be changed frequently during the design process.  You must think of your building in three dimensions as a form and as a building now.  Walls, doors, windows, and flow of the building begin to be considered and thought about.

The bubble diagrams and floor plan sketches will now be transfered from the trace to Revit.  The levels (heights) should be thought out and placed into Revit (remember to really put some thought into the names and how they will help you further in the process).  This thought process will force the designer to think in three dimensions and more in depth about the volumes being created.  Keep in mind that the ceilings, walls, and floors could should be kept very "generic" in this stage.  These simple generic floor plans will allow the designer to analyze the flow and areas of the project while creating a solid foundation for your building model.

Furthermore, the model created some basic sections and elevations to study.  Again, remember to keep this stage of the Revit model very loose without having much detail.

Here are some examples I've created to illustrate this step:
I will create example floor plans and area plans in the future.  Sorry, technology doesn't always want to be in our favor!  Having some issues with my recording software.

Coming up...

I will introduce a few new programs.  After this simple introduction I will explain their roles in the third step of Revit Classroom Workflow.       

Monday, April 6, 2009

Revit Introduction Video

1 comments
Great video explaining Revit.  One of the most coherent videos I have seen.  I wish I could find it in a higher quality.

Thanks to Greg for the find.


Revit Classroom Workflow - Step 1

0 comments
Conceptualization

Many of you may not think that Revit would be used so early in the design process. The truth is that Revit is great for creating quick and analyzing forms when utilized correctly (this is especially true with 2010's geometric form capabilities just around the corner).

First, the professor presents the program. The program will usually contain room requirements, owner requirements and guidelines, and square footage requirements. With this information alone and a concept sketch or two you will be able to produce a quick scaled and proportional mass or masses to analyze in three dimensions.

It would not be true if I were to say that a majority of the conceptualization step was not spent outside of Revit and outside of a computer. A roll of trace and a pencil are an irreplaceable tool during the design process. Even with Revit I find myself using half a roll or so of trace during the entire design. Ultimately, Revit will parallel your sketches and physical models during conceptualization. The combination of the three will greatly improve your own understanding of the masses and concept as well as helping you to be comfortable with your concept and two and three dimensions.

I have created an example that shows a quick concept sketch and how it parallels with the use of Revit. Additionally, this will have to be updated with the release of Revit 2010 and it's new Conceptual Mass capabilities.


Here are a collection of the DesignReform.net Videos using 2010:

Sunday, April 5, 2009

Integrated Project Delivery (IPD)

0 comments
I wanted to briefly introduce and point out some references about IPD before moving on with my "Revit Classroom Workflow" experiment. IPD is the direct result of using BIM products such as Revit and benefits the owners, constructors, and designers of a project.


I heard about IPD only recently. The interest in it forced me to do a ton of research on it and learn all about it. Although IPD applies mostly to the practicing professional architect that does not mean we do not need to learn and understand it. Imagine becoming a chef without knowing how to cook pasta at an Italian restaurant.


I plan to simplify IPD and find a way to incorporate it into the Revit Classroom. The following is a direct quote from AIA's IPD Guide. It explains the benefits a designer will have by using IPD:


"Designers— The integrated delivery process allows the designer to benefit from the
early contribution of constructors’ expertise during the design phase, such as accurate
budget estimates to inform design decisions and the pre-construction resolution of
design-related issues resulting in improved project quality and financial performance.
The IPD process increases the level of effort during early design phases, resulting in
reduced documentation time, and improved cost control and budget management,
all of which increase the likelihood that project goals, including schedule, life cycle
costs, quality and sustainability, will be achieved."

I have also accumulated a few starting point references for everyone to learn and further understand exactly what IPD is all about.

General IPD References:
Laying a simple foundation of this information and then using the chart I posted earlier during your design studio's will also have many advantages to you, the student. My goal over the next few weeks is to help my fellow students in understanding the real reasons why they are using Revit.

Saturday, April 4, 2009

Revit Classroom Workflow

0 comments
Why are we using Revit?


Two semesters ago I took a design course. It was a level 2 design course and there were about fifteen kids in the entire class. Out of those fifteen kids I was the only student using Revit.

Now, in that same design course, in the same school, more than half of the students are using Revit. Within one year the number of students using Revit rose from 6% to 60%!

Firstly, I would like to analyze and address the reasons why so many students decided to use Revit. My personal opinion is that almost every student who took the leap within such a short period of time did so for one reason. The "wow" factor. Ultimately, back when I was the only student in the class using Revit 2009 was just being released. None of the students even bothered to take the time and learn Revit until they saw the renderings being produced by Revit 2009. SOLD! The "wow" factor wins again.

The problem I have is not with the fact that more and more people are using Revit. The problem is the reasons why they are using Revit. I have confidence in saying that if I were to ask my fellow students why they are using Revit they would answer with one or more of the following:
  • It makes a 3D Model for me.
  • It makes realistic renderings
  • It makes sections and elevation for me.
  • It plots nicer than my CAD files did.
  • Etc... etc...
Although these are all benefits of using Revit they are not nearly the only benefits.

Greg, over at Revit3D.com, and I have had numerous conversations revolving around this topic. How can we control the future of Revit? How can we stop Revit from becoming just another drafting tool the way Architectural Desktop did? I believe Greg's exact words were, "We don't want these students graduating and being a bunch of BIMpanzees!" Sadly, this will happen if we, the students, do not educate ourselves on the many other benefits of using Revit in the future.

My goal is to create a guide and starting point for my fellow students and I. There are many advantages to using Revit in the classroom that will parallel the use of Revit in professional practice. Just because our professors don't teach or require the use of Revits extensive capabilities does not mean we cannot or should not incorporate them into our design process. The following chart is a preliminary workflow diagram I have devised as a general outline and starting point. With this guide we can simulate the use of Revit in professional practice while having a major advantage over the rest of the students in our design studio's.


Revit Classroom Workflow Steps:
  1. Conceptualization
  2. Design
  3. Analyze
  4. Implementation/Documentation
  5. Pre-Presentation
  6. Presentation

Over the next few posts I will explain each of the steps of this workflow chart. I will explain how Revit will be utilized. I will also explain and introduce many new programs some of you might not have ever heard of. Enjoy. I have opened up the dialogue. Please email me or comment with questions and input that will further excel this experiment of mine.

Friday, April 3, 2009

Google Server Info Released

0 comments
Not Revit related at all, but for those of you computer nerds like me this is quite an interesting article.

Autdodesk 2010.

0 comments
We just received Autocad 2010 in the mail at the office today.  One thing I have noticed.... There was not any excitement about it.  The only excitement felt was the excitement that Revit 2010 will be following shortly.  

I don't think we have been excited to receive the new CAD since at least 2007.  

11 Days left.

Phillip Bernstein, FAIA Lecture Series

0 comments
I will be attending a lecture at the University of Hartford here in Connecticut.  Anyone who is in the area should really attend it as well. 


University of Hartford: 2008-2009 Architectural Lecture Series 

Architect Phillip G. Bernstein, FAIA, will lecture on Thursday,
April 9, on the “The Role of the Future Architect.” The lecture
will begin at 6 PM in Wilde Auditorium and is open to the
public. Bernstein will consider how the digital revolution and
information management in architecture is shaping the future
of the profession. Bernstein is a Vice President at Autodesk,
a leading provider of software for the architecture,
engineering and construction industry. A practicing architect
with 25 years of experience, he leads Industry Strategy and Relations for the
AEC Division where he is responsible for setting the company's future vision
and strategy for technology serving the building industry. Bernstein teaches
Professional Practice at the Yale School of Architecture.

Anyone in the area should definitely check this lecture out.  Greg over at Revit3D.com has informed me that he is an immaculate speaker and a leader of the IPD/BIM movement.  

Email me and let me know if you are attending so we can open a dialogue and really expand on what Phillip has to say.

I found this great video by Phillip and others... This is a pefrect lead into the next series of posts to come.


Thursday, April 2, 2009

Revit 2010 Ship Date!

0 comments
Once again, Revit3D.com let us all know when the new Revit will be shipping!


Sadly, for us students it usually takes a little bit longer to release on the student community.  I will keep you up to date.

OAN Competition - Sketches

0 comments
I don't know if its just me or an architectural thing, but I love to see sketches.  I love seeing the drawings others made; concept sketches, flow diagrams, bubble diagrams, details, etc...  

I've decided to share some of my personal sketches in hopes that you all love to see hand sketches as much as me.  The sketches are  select few that I have made over the past few months for the Open Architectural Network Competition.  Enjoy!


Wednesday, April 1, 2009

LEED AP Exam Registration.

2 comments
Only an hour left!!  Last chance to register for LEED v2.2

I registered last week and scheduled today.  As much of a challenge it will be to learn all of these damn credits while working and going to school full time I am excited.  

Anyone else out there taking it?

Here are some sites I managed to find so far...

Autodesk Student Community: Career Center

0 comments
For those of you who belong to the student community I was clicking around and found the Careers section.  

This portion of the site is powered by Career Builder.com and appears to be very powerful.  I searched for jobs in my area and found a whole bunch (usually I find one or two relating to architecture on many other sites).  Give it a try.

Revit 2010 Not until September!?!?

3 comments
I have sad news Revit world... I was just informed that Revit 2010 is being pushed back to September of this year.  This sure is a bummer...


APRIL FOOLS!!!!!

Did I get anyone?!?!

I know... that was cruel... sorry.