 |
| Click Image to Enlarge |
Fortunately, Autodesk introduced "Displaced Views" back in Revit 2014. With a few little tips and tricks you can make some awesome looking axons like the one above and the ones below. Continue reading to view a video tutorial on how to create similar axons (including the neat looking dotted displacement path lines)....
Revit Exploded Axon Examples:
Here are a few more examples of what can be done using the techniques from this tutorial (click to enlarge):
Exploded Axon Techniques Tutorial Video:
BIM After Dark - Volume 1
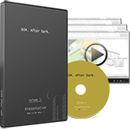
 If you liked the tutorial above and want to learn how to make similar images then you will definitely enjoy BIM After Dark - Volume 1: BIM can be sexy.... The full length tutorial series is filled with tips about enhancing your presentations.
Are you're tired of people telling you that BIM is not for presentations? That Autodesk® Revit® is only good for documentation? You spend hours developing a fully detailed building information model, why not show it off? Learn how to create beautiful, professional, and high quality presentations with your building information models.


