We have discussed how we can define wall structure horizontally.

Now the problem is, how can we define the structure vertically? We have discussed how we can add reveals and sweeps to do this. In this article, let us discuss how we can create a vinyl siding wall as example. The common way (and probably most suggested) to do this is simply using horizontal lines pattern, not actually creating real 3D forms. And later, we can use drafting tools to add details for the vinyl siding wall.
The reason why we do this is creating many horizontal sweeps/reveals can take much of your computerresources. When you are modeling a large building, this can be a problem. Of course, there are a downside: you have to take care the details later, manually.
Now, vinyl siding wall commonly used for simple houses, not multi story building. So I guess it is save if we create a real 3D vinyl siding, it would be acceptable.
Create a new profile. Use Metric Profile-Reveal.rft (or Profile-Reveal.rft for imperial).
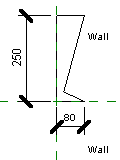
You need to define how your vinyl siding layer will be cut by this profile. Create reveal like below. Pay attention to the wall location. I use 250×80 as the outline. Remember this value, we are going to need it when defining our wall.

Save this file, and load it to your project.
Now why are we using reveal instead of sweep? You will see the difference later in the comparison section.
Applying the Wall Reveal
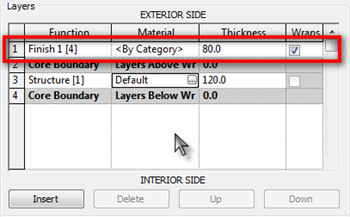
In your project, choose one of the wall type you want to modify. In this example I use generic 200mm. Duplicate, and add one more layer as your vinyl siding layer. Change the height to match your sweep profile.

To enable us adding reveal, change the view to section. Change it from drop down selection below the preview area.

In the modify vertical structure group, click reveal.

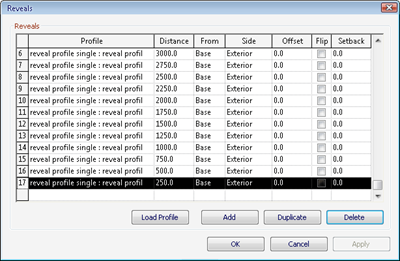
This will open another dialog box. Click add below this dialog to add a reveal definition. Select the reveal profile you created previously in the profile column. If you haven’t loaded it, click load profile.
Define the distance from base. Do it several times until it reach the highest wall in your design.

We are done. Click OK and close all the dialogs.
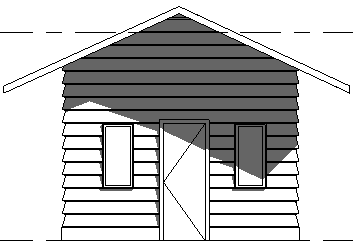
Now try to create walls and see how it looks like. I think this is quite nice :)

Continue to the rest of the post....


