


When I was given the opportunity to purchase and use a LulzBot Taz 6 my first reaction was, "awesome". Until I started doing research on 3D printing an actual Revit model, "not so awesome". With a deadline for printing a project approaching my feeling of excitement turned to anxiety.
I found out that you just can't "press print" on your every-day Revit model and expect it to 3D print.
I also found out that there is very little information regarding the processes required to actually 3D print your working Autodesk Revit building models... So, I will save you the trouble of searching and do my best to break down the quickest and most effective method I've found to printing ANY of your Revit models.... Step 1 is the key...
 |
| LulzBot Taz 6 : 3D Printer Used to Create this Post... |
Hardware Used:
- LulzBot Taz 6
- LulzBot PLA Filament
**Tip**: Not all filament is equal... Do some research on your printer and what filament works best with it...
Software Used:
Autodesk Revit 2017
STL Exporter Plug-In (Revit)
Cura 21.04 (LulzBot Profile)
Process Outline:
1. Create and in-place component and "mass" inside the Revit building model elements.
** This step is the most important step in your process... **
Using extrusions, sweeps, and voids if possible (touching or encroaching inside face of walls/windows) create an in-place component that follows the massing of your building. This component will help the 3D Printer software generate a "water-tight" model. In-place conceptual masses will also work for more complex geometry.
This component/mass is the key to successfully printing a Revit model. Revit uses individual elements that are all their own"water-tight masses". Therefore, when you simply import a typical Revit file into a 3D printing software, it will try to print each individual element (refer to Step 5 to see what I mean). This would require a ton of "support structure" and many elements will not print because of the reduced scale.
 |
| 3D Printing Software requires a "Water-tight" mass... Build one inside your models... |
 |
| Try to use simple extrusions, voids, blends, and sweeps. This makes it easier to join your solids and form a truly "water-tight" object. |
 |
| Alternate view of "mass" built within the total Revit model... |
2. Create Dedicated 3D Views with your in-place component/mass visible along with your Revit model elements (ie. doors, windows, walls, etc...):
Now that you have made a solid mass built inside your model, turn your native Revit elements back on and get your views ready for exporting. This is important because, even though they all wont print, lots of the exterior detail (built with Revit elements) will print adhered to the solid mass. Below is an example of the Revit elements and in-place mass all visible in a 3D view.
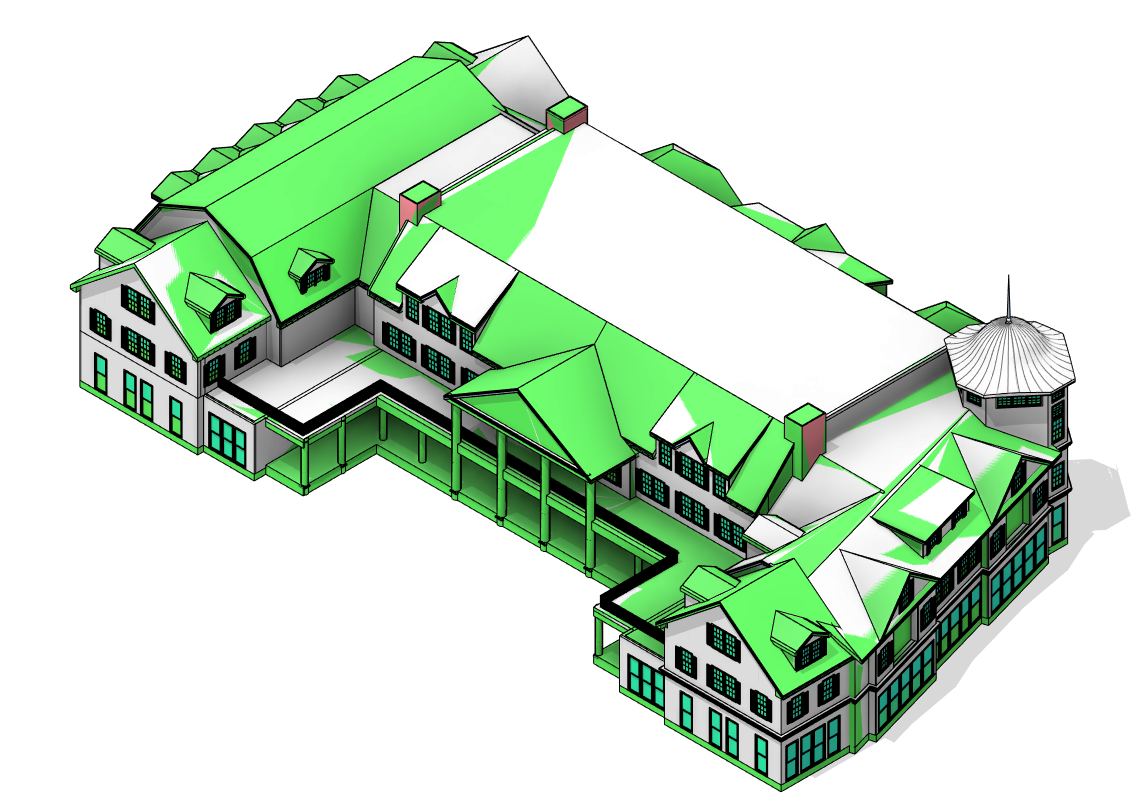 |
| Image of view with internal "Mass" and Revit elements visible. Ready for an STL export... |
3. Export to STL
There is a simple and free exporter in the App Store. Simply press export, select your units (make sure you select the same units as your Revit file) and click save. For units, I will typicall choose "Use Internal : Feet". Now your model is ready to be imported into your 3D printer software as an STL.
**Tip** The STL exporter will export current visible settings in the view. Which means you can temporarily hide/isolate elements and export them if need be.
 |
| Notice "Use Internal : Feet" for the units... |
4. Open STL file in Cura and scale it.
Most 3D printing software will import STL files. We used Cura as our 3D printer software because it has a pre-built profile that works with our LulzBot Taz 6.
Simply import your STL file and scale it as required.
**Tip** We found the scale factor from Revit to be easy to figure out: When exporting in "Use Internal : Feet" via the STL exporter, scaling the object in Cura by 0.6 yields a model print scale of 1"=40'... Scale factor of 0.7 yields a model scale of 1"=30'... and so on...
5. Check print layers in Cura:
All models will look great when you first load them into Cura... Look how solid this one appears to be:

But then, when you turn on the "print layers" view in Cura you see this:

The blue lines above represent "temporary supports" and the red represent solid print layers. The model above is a typical Revit model WITHOUT the internal in-place mass. You can see the printer software is only recognizing certain elements and a hollow model... If you attempted to print this you would get a blob of plastic.
After adding in our in-place mass, this is what the layer view looks like in Cura.

Notice the consistent red lines? Those are solid exterior "wall" layers of your print. This model will print well. Additionally, using the slider on the right hand side of Cura (or "CNTRL+Down Arrow" in Cura) you can step through each print layer and get a sense for how the model will be printed:
 |
In the image above (being sliced on the 18th level of this print), notice the model on the left is showing consistent red outlines and yellow fills. Meanwhile, the model on the right is full of blue temporary supports and inconsistent red outlines. The model on the left contains our "in-place" component and the exterior Revit elements.
6. Send to Printer via USB or SD Card
Now, the easy part... Press Print!

7. Print until its correct…. Or it prints all the way through…
I added this final step because, unfortunately, 3D printers don't appear to be the most consistent machines in the world. Perhaps, the more money you spend on a printer the more consistent it is. Either way, be aware (and don't get discouraged) if you have to print something a few times to get it right.
You can do everything perfectly and the print may fail for many different reasons... Sometimes layers shift, top layers show ripples, etc... I didn't want this post to be about the actual printer troubleshooting (there will be plenty of information out there when you're troubleshooting your issues).
In Conclusion:
Ultimately, the key to 3D printing your Revit models (as they stand today) is to take a little time and create a solid "in-place" component to fill in your prints. At the end of the day, we found this to be the quickest way to convert a model used for construction documents into a 3D printable mass.
Has anyone else found any other processes they've used?! If so, comment below...
I'll end with some awesome model photos:


