


Design
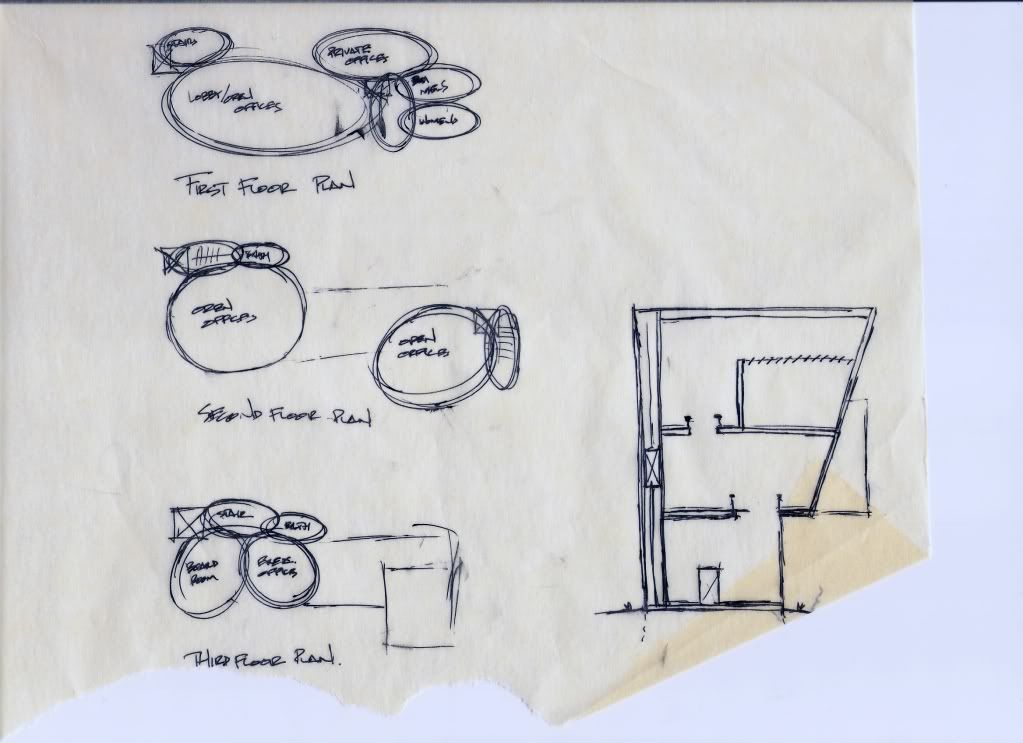
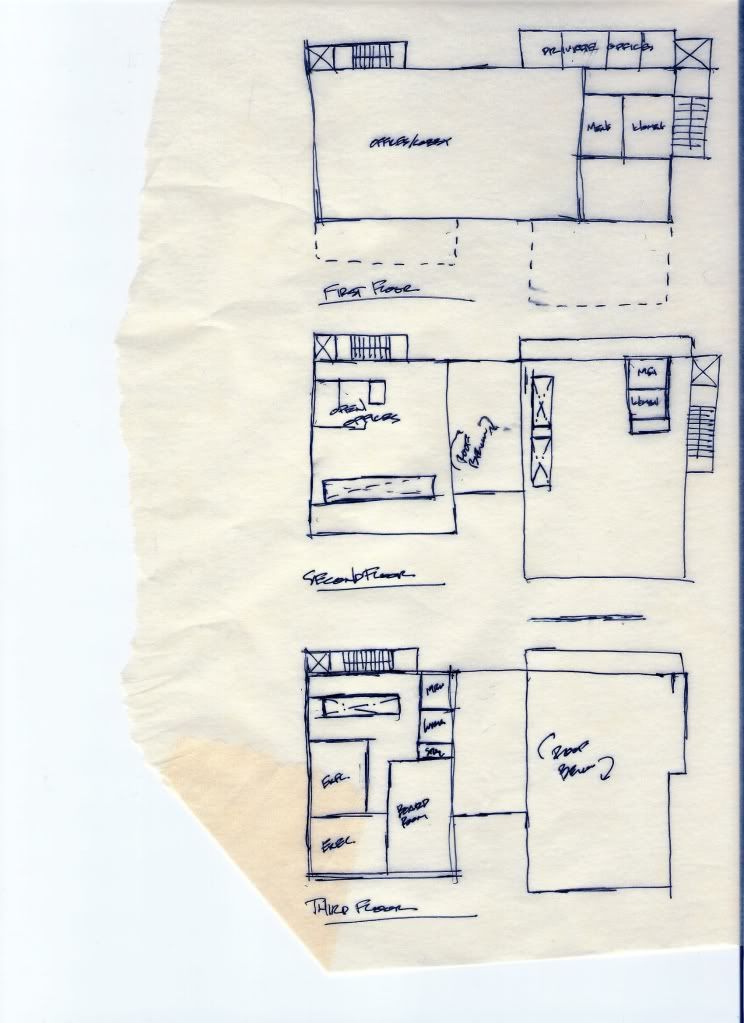
The bubble diagrams and floor plan sketches will now be transfered from the trace to Revit. The levels (heights) should be thought out and placed into Revit (remember to really put some thought into the names and how they will help you further in the process). This thought process will force the designer to think in three dimensions and more in depth about the volumes being created. Keep in mind that the ceilings, walls, and floors could should be kept very "generic" in this stage. These simple generic floor plans will allow the designer to analyze the flow and areas of the project while creating a solid foundation for your building model.
Furthermore, the model created some basic sections and elevations to study. Again, remember to keep this stage of the Revit model very loose without having much detail.
Here are some examples I've created to illustrate this step:
I will create example floor plans and area plans in the future. Sorry, technology doesn't always want to be in our favor! Having some issues with my recording software.
I will introduce a few new programs. After this simple introduction I will explain their roles in the third step of Revit Classroom Workflow.

1 comments:
Take a look at Trelligence Affinity. You can get the link from BIMcycle.com. Space programming and bubble diagrams for everyone and it imports right into Revit as 3D schemetic with room volumes.
Post a Comment