


 |
| presentation |
 |
| documentation |
 |
| creation |
 |
| automation |
 |
| bim after dark live |
Thursday, December 24, 2009
Submit Revit Model - Installation Images


Friday, October 23, 2009
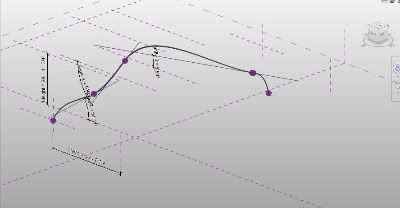
Tutorial - Revit and Calculus - Part 1
"Formulas support the following arithmetic operations: addition, subtraction, multiplication, division, exponentiation, logarithms, and square roots. Formulas also support the following trigonometric functions: sine, cosine, tangent, arcsine, arccosine, and arctangent.
The valid formula abbreviations for arithmetic operations and trigonometric functions are
• Addition— +
• Subtraction— -
• Multiplication—*
• Division—/
• Exponentiation—^: x^y, x raised to the power of y
• Logarithm—log
• Square root—sqrt: sqrt(16)
• Sine—sin
• Cosine—cos
• Tangent—tan
• Arcsine—asin
• Arccosine—acos
• Arctangent—atan
• e raised to an x power—exp
• Absolute Value—abs
You can enter integers, decimals, and fractional values in formulas, using normal mathematical syntax, as shown in the examples below:
• Length = Height + Width + sqrt(Height*Width)
• Length = Wall 1 (11000mm)+ Wall 2 (15000mm)
• Area = Length (500mm) * Width (300mm)
• Volume = Length (500mm) * Width (300mm) * Height (800 mm)
• Width = 100m * cos(angle)
• x = 2*abs(a) + abs(b/2)
• ArrayNum = Length/Spacing.
Parameter names in formulas are case sensitive. For example, if a parameter name begins with a capital letter, such as Width, you must enter it in the formula with an initial capital letter. If you enter it in a formula using lower-case letters instead, for example, width * 2, the software will not recognize the formula."
- Creating a Conceptual Mass.
- Create From with Spline and Profile.
- Edit and Create formulas within Families.
- Drive formulas with parameters.
- Add Profile.
- Use CALCULUS IN REVIT!
Tuesday, October 20, 2009
Revit 2010 Advantage Pack and Students
So the way the students can help… is to let the professors/institution know that they need to explore these subscription packages so they will have the latest extensions!..."
Revit 2010 Advantage Pack.
- Curved Beams
- Slanted Columns
- Create Trusses
- Beam "Coping" Tool
- Slab Direction and Decking
- Tag Beam Systems
- China
- Russia
- Insulation Tools
- "A" and "W" User Defined Paramters in Schedule Field
- Placing 3D Beams from geometry references in imported 3D drawings.
- Control Beam Length tolerance.
- Wood Framing - Extension
- Interferences of Reinforcing Bars- Extension
- Bridge Design Modules- Extension
- Temporary dimensions in layout mode.
- MEP Performance Improvements.
- "Contrification" Content.


Wednesday, August 19, 2009
Revit Architecture and Civil 3D Videos
Transferring Site Data Between Revit Architecture and AutoCAD Civil 3D
This skill builder is a series of videos that show how to share and manipulate site data in Revit Architecture and AutoCAD Civil 3D.
| Creating a Toposurface in Revit Architecture |

| Exporting a Revit Architecture Project for Use in AutoCAD Civil 3D |

| Importing Revit Architecture Data into AutoCAD Civil 3D |

| Exporting an AutoCAD Civil 3D Surface to Revit Architecture |

| Updating the Revit Architecture Toposurface with an AutoCAD Civil 3D Site Design |

Monday, July 20, 2009
10 Conceptual Massing Tips - Revit 2010
Great post over at RevitClinic explaining some tips and tricks about Revit 2010's conceptual massing environment.
Click here to view their post.
"10 quick tips to utilize in the conceptual mass workspace. Here they are in no particular order:
1. Spacebar Toggle Coordinates
When selecting an object on a form, you can use the spacebar to toggle the coordinates between the object and the model orientation.

2. Reference Lines versus Lines
When forms created from lines are deleted, the original lines are deleted as well. When forms created from reference lines are deleted, the reference lines remain to easily recreate the form.

3. Background Color
Under “View Properties”, “Graphic Display Options” you can specify the gradient background on or off as well as adjusting the colors if needed.

4. Remove Divided Surface
After the divide surface tool is utilized, you can later remove the divided surface if needed simply by highlighting it and choosing the “Delete” tool.

5. Enable 3D Snapping
To easily snap between points in 3D, after selecting the line or reference line tool a “3D Snapping” setting will become active on the Options Bar.

6. Rehost a Reference Point
When a reference point is highlighted, a “Rehost Point” tool will appear on the ribbon. By selecting the tool, you can easily host the point to another location.

7. Create a Sphere
Draw the line for rotation, draw the arc as needed, then “Create Form”. Afterwards in the "Element Properties" of the sphere, you can adjust the “Start Angle” and “End Angle” between 0 and 360 degrees.

8. Create a Plane with Adjustable Height
Reference lines allow for creation of planes with “Positive” and “Negative” offsets in "Element Properties". Simply draw a reference line, “Create Form”, and open "Element Properties” to adjust offset value.

9. Mass Transparency
In the Conceptual Mass family or project, you can adjust the transparency of the mass objects. Edit Materials, and locate the “Default Form” material. You can slide the transparency as needed; the default is 0 % in the family environment but 70% in the project environment.

10. Parameters for Divided Surface
After dividing a surface, open the "Instance Properties" for the object. You can associate a parameter to the values if you would like to utilize formulas or create numerous family types with multiple values in “Types”.

Tuesday, July 7, 2009
Service Pack Update 1 - Revit 2010
Autodesk® Revit® Architecture 2010 — English
IMPORTANT
This download is the latest update for Autodesk® Revit® Architecture 2010 software as a standalone product and as part of AutoCAD® Revit® Architecture Suite 2010 and AutoCAD® Revit® Architecture Visualization Suite 2010 software.
It is available to users who have purchased a valid license for Autodesk Revit Architecture 2010, AutoCAD Revit Architecture Suite 2010 or AutoCAD Revit Architecture Visualization Suite 2010, and is subject to the terms and conditions of the end-user license agreement that appears during installation.
For a list of improvements, please download the Autodesk® Revit® Architecture 2010 Update Enhancement List:
 | Update Enhancement List (pdf - 67Kb) |
Note: Build Number can be found in the Update Enhancement List
Update 1 – June 2009
Important Note:
Update 1 is not a full install; rather it is using service pack technology similar to AutoCAD®- based products. Prior to installing the Update 1, please verify that you have already installed the First Customer Ship build of Autodesk Revit Architecture 2010 which is available below.
Before You Download
Please read before downloading and installing:
 | Service Pack Readme (htm - 55Kb) |
Get Started
Read all instructions above then click the following link to download.

Note: The service pack can be applied to both the standalone and suite versions of Autodesk Revit Architecture 2010.
Thanks to Greg at Revit3D.com for the Post ad the initial post in June!
Wednesday, June 17, 2009
Tutorial - Roof Dome - Conceptual Massing

Cool tutorial over at Revit Clinic with a great video.
Wednesday, June 10, 2009
Soft Shadow Techniques - Tip
What this actually does, is turns off the sun (as its night time ), but keeps the sky image map and the low level ambient lighting. As noted by Zach, to achieve the best results, it's worth setting your render quality to "best" to get the best shadow depth you can. Setting your render to "best" will obviously result in long render times, so it's probably worth doing a few low resolution renders in the first instance to be assured that the settings will work for you.
Check out the Post Here.
Thursday, May 7, 2009
Revit 2010 Tutorial - Seamless Panels
Wednesday, May 6, 2009
Revit 2010... Suck it up and go for it!
- Autodesks explination about Revit 2010 and the reason behind the much talked about Ribbon Tool bar. (Credit to Revit3d.com)
Don't be afraid of change... give it a chance!
Friday, May 1, 2009
Revit 2010 Links and Videos.
Wednesday, April 29, 2009
Having trouble with 2010?
Check it out here!
Thanks to Greg over at Revit3D.com for the fin.
Thursday, April 23, 2009
Revit 2010 Enhancements.
Tuesday, April 21, 2009
I.E.S. Version 5.9.1 for Revit 2010!
Integrated Environmental Solutions is delighted to announce that the latest edition of the
Download version 5.9.1 TODAY!
Full details regarding all software updates in this version are contained in the updated Release Notes and New Features documents.
Monday, April 20, 2009
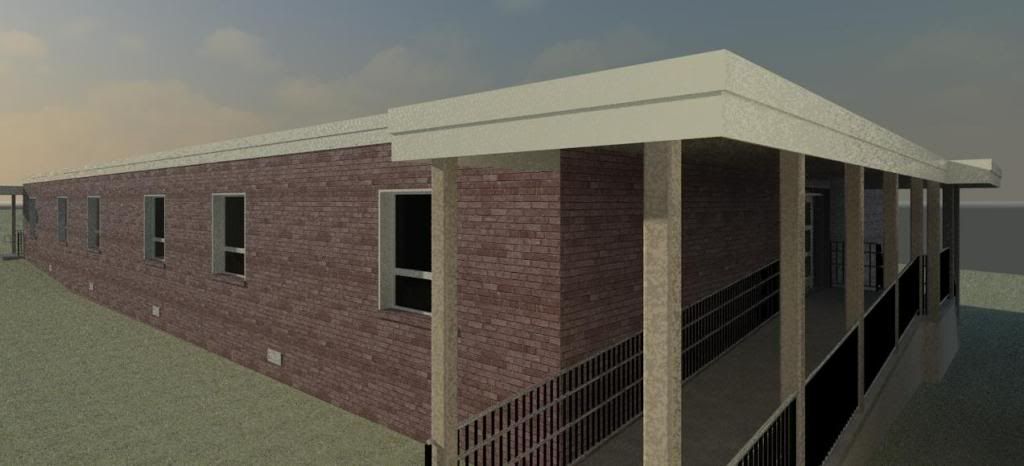
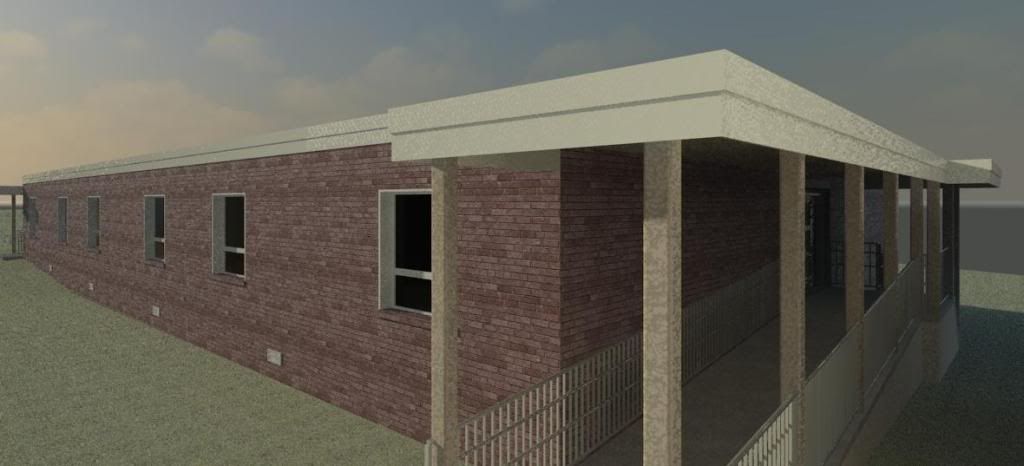
Revit 2010 vs. Revit 2009 - Rendering
- 15.4" Macbook Pro
- Windows Vista Home Premium 64bit (Bootcamp 2.1)
- 4gb Ram
- Intel Dual Core 2.4
- Quality - Medium ( I didn't feel like sitting there all day)
- Resolution - Screen (1180 x 537)
- Lighting - Exterior (Sun only)
- Revit 2009 = 6:38
- Revit 2010 = 4:57
- Revit 2009 = 4:5:36
- Revit 2010 = 3:10:58
Roughly, 25% increase! Looks to be constant!
Revit Architecture 2010 for Students!
Autodesk Student Community
Thursday, April 16, 2009
Download Revit Architecture 2010 Now!!
Download, download, download! Even if you can't register you can get used to the program. The only restriction is you cannot save.
GO!!!!!!!!!!!!!!!!!!
Wednesday, April 15, 2009
AutoCAD 2010
This COULD mean Revit 2010 will be availiable to students within the next two weeks... I will keep you all updated.
By the way.. here is Autodesk Ed's youtube channel. Some interesting videos there!
Monday, April 13, 2009
Revit 2010 Information.

The Revit Kid.com! by Jeffrey A. Pinheiro is licensed under a Creative Commons Attribution-NonCommercial-NoDerivs 3.0 Unported License. Based on a work at The Revit Kid.com.