


In my experience, the roof tool is still a mystery to many Revit users. Either they have only had to create flat roofs, they have been using extrusions, or they just haven't been using it correctly. If you are one of these people, it's okay... You are not alone!
For the reasons mentioned above, roof tutorials are always the most searched on this blog. I was demonstrating an eave detail to a colleague of mine when it was apparent that he had NO IDEA you could do what I was doing... That led me to this post. A simple run down of the different eave (or soffit ) settings effect your roofs...
Continue reading to view the tutorial....
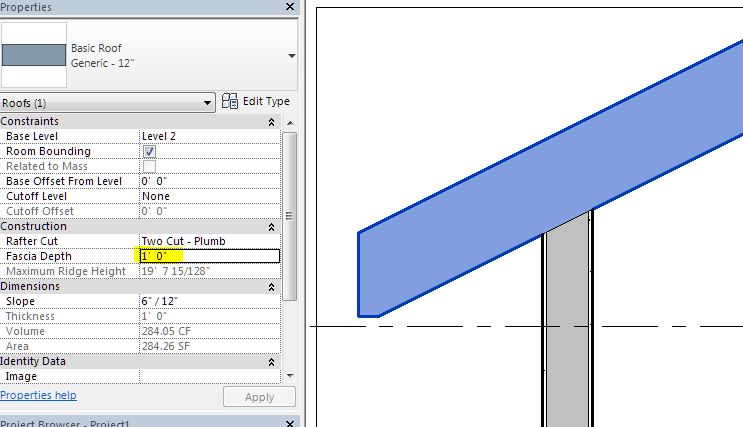
The following is a section view of a gabled roof with a 6"/12" slope. By selected different "Rafter Cut" settings and "Fascia Depths" I am able to create a multitude of different details....
1. Plumb Cut
 |
| Click to enlarge... |
2. Two Cut - Plumb: 0" Fascia Depth
 |
| Click to enlarge... |
3. Two Cut Plumb: 6" Fascia Depth
 |
| Click to enlarge... |
4. Two Cut Plumb: 1'-0" Fascia Depth
 |
| Click to enlarge... |
5. Two Cut Square: 0" Fascia Depth
 |
| Click to enlarge... |
6. Two Cut Square: 6" Fascia Depth
 |
| Click to enlarge... |
7. Two Cut Square: 1'-0" Fascia Depth
 |
| Click to enlarge... |

